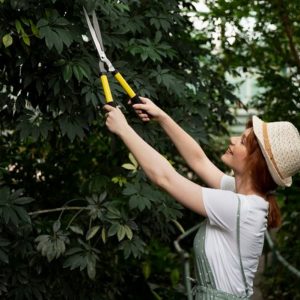
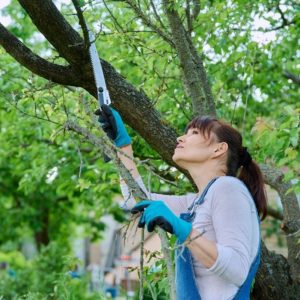
How to burn a signature into wood? Before considering this, I would rarely consider learning how to burn a signature into wood. But a few years ago, I got to remake an old grandfather clock, which led to the exposure of the furniture’s finer details. The bottom has a signature burn of its year make and initial of the builder. That got me thinking about why burning signatures into your work should be of interest for several reasons. Be it for value or to mark my woodworking progress, using signatures for my work was encouraging.
(As a side note, I’ve written a post on How to Put Your Name on Wood which you can read by clicking here)
But my initial steps would often feature embarrassingly crude burn signatures due to the methods I put to use. Later on, I would progress after learning on the different techniques on how to burn a signature into the wood. For that reason, today, we get to see how to burn a signature into wood. You should be aware that its a whole new world with burning signatures on wood and there is no better space to start with than this post.
Table of Contents
How to Burn a Signature into Wood with Wood Burning Techniques
Rather than leave you off to try basic techniques, you will get to know the best ways that woodturners design their logos and initials. If you already got to try using a permanent marker or pencil, you already know that they portray poor wood craftsmanship. Since they are subject to wear, you cannot expect the pen or marker to last that long.
That is why learning burning signatures is the next best thing in identifying with your exceptional woodwork designs. But I suspect whenever you ask the question on how to burn a signature into the wood, you will get a lot of different answers. I also got the same decisive opinion. But, I did compile the best methods carvers and turners have made the best use of in their works.

The Technique of Using Wood Burning Stamps to Burn Signatures on Wood
A wood-burning stamp works on a similar concept as a soldering iron but much more powerful. As you can see from this list of best sellers wood burning stamps, they even resemble soldering irons. The only difference is the end design that replaces the typical sharpy tip for a disposable metalhead on the threaded rod.
You can also expect using the hot stamp to be as easy as the soldering iron. You only have to heat it, and stick it on your work for a sharp professional-looking signature.
All you will do is to create a sizeable metal engraving that can withstand the heat of the impressing. But this is not for all wood burning stamps. Some burning stamp designs come with standard shapes for the stamp head, meaning application might differ. Remember, you might want to have a customized flaming stamp head to fit your signatures on also uneven wood surfaces.
For that matter, there is the option actually to get custom wood burning stamps. Of sorts, there is a bit of experimentation and would allow you to anchor your signature impressions in less than an hour. The only difference with this design is the use of custom-made signatures on the stamp head.
But, custom 3D-printed burning stamps are quite expensive to remake with each fade.

Use Branding Irons to Engrave a Signature into Wood
Branding irons work on a similar concept to the wood-burning stamps. The significant difference in the branding iron concept is the iron head setup in each burner branding device.
Most of the time, the branding irons will feature carbon-based heads that can withstand high heat. In a different version, the branding head is a significant carbon piece that can make a sustainable impression. That also makes their burning signature process like the stamp heads. You will have to heat it till a specific temperature, and stick it on your furniture work.
A significant advantage of a branding iron is its inexpensive nature as a wood-burning solution. You can easily customize the branding iron markings with almost any design. They also tend to last long, even with minimal maintenance.
But not all branding irons are slick in how to burn signature into the wood. Since they rely on the application pressure to work. At many times, you might find an un-derburn happens to leave the name in distortion.
An overburn can also happen by using a branding iron for burning wood signatures. That would result in wood damage on the surface of the furniture. In rare cases, uneven burns also happen, which means you can try best to fix by doing a reapplication.

How to Burn a Signature into Wood with Pyrography Pen
How to burn a signature into wood with pyragraphy pen? One of the most used methods and also considered one of the simplest methods mentioned in the series how to burn a signature into wood.
A much modern approach on how to burn a signature into wood is the use of pyrography pen. From the outlook, there seems like soldering iron kits but with much-advanced technology and equipment for finer details in woodworking designs.
In your search, you will see that pyrography pens are straightforward in how they work. The best selling model devices would have a pyrography electric pen, butane torches, temperature monitors, and even controls. Besides, the pyrography pen kits also come with multiple tips for using the stylus in different applications. An example is comparing the Hi-Spec pyrography wood-burning set and the Yinkuu version. Both are straightforward advanced pyrography pens, but the latter offers many more options for customization.
However, you will have to bear that pyrography pens are not standard toolkits. Indeed, you will find plenty of options at the lower end of your budget, but you will later question their signature burning qualities.
Another disadvantage is that most pyrography pens are also quite complex. You might come across the more straightforward pen packages of a control box, tips, and a stylus pen. But other devices are looking to expand what they can do and, unfortunately, in the process, end up confusing woodworkers and turners. Thus, this makes the pyrography pens a perfect fit for professional woodwork designers with the necessary experience in signature burning.

Instructions for Using Pyrography Pen to Engrave Signatures on Wood
You have already thought of purchasing a pyrography pen to try a hand at signature burning. You are not alone since both amateur, and professional woodworkers now opt for the electric devices due to various conveniences. But how many of these woodworkers know how to use the pyrography pens on the right scale? If you are asking the same question work with this next step-by-step guide might work for your electrical device application
- You will need to scrap the piece of wood that you intend to burn the signature. Make sure it is clean and smooth with no grains.
- Assemble the pyrograph pen toolkit. That will include attaching the control box, stylus pen, and the power source.
- Attach the most appropriate wood-burning pen tip that is easy to control and has accuracy on the wood surface.
- Fire up your electric pen and track the temperature for the burning phase. Since most burning happens at lower temperatures, you can sure about 700 degrees F will be enough as operational temperatures. But you can check the owner’s manual for what is the best temperature to burn a particular signature.
- Practice your signature strokes slowing while texturing the application to the piece of wood. Be sure to hold the stylus at a sufficient angle that does not let you use excessive pressure when signature burning. You can adjust this by checking on the rheostat temperature to ensure the conditions coordinate with your texture burning to avoid underburns, or overburning the wood.

- If there is no pulling effort on your burning strokes, you could be running at a high heat setting. Sooner, you will see the surface turn black rather than the toast color you were expecting.
- You might also have to use an excessive amount of pull when texture burning, and this only signifies an operation at a too low of a temperature setting. The resultant work will always be a light brown stroke that will need you to consider readjusting the temperature settings.
- After adjusting the temperatures to suit your signature burning, you can now burn your design with more precision and shading.
- Once done, switch off the unit and remove the hot pen tips using a pair of pliers and place them on a bowl to cool.
- When the pen tips are cool, use factory-recommended methods to clean them and ensure re-use for the next signature burning session.
What is the Most Effective Tip for Lettering While Using Wood Burning?
A combination of a round tip and a skew tip is the one that works best for me. Both the round and skew tips are useful, although the round tip is better for nailing curves while the skew tip is better for straight lines. To get lines that are clean and crisp, you need a steady hand, a lot of patience, and some time. Reduce the heat, move slowly, and pay attention to the neat lines that you are burning.
FAQs
What is the best way to write on wood?
We recommend using a pencil or a ball point pen due to the porous quality of the wood. Gel pens also work nicely, as long as the ink is allowed to dry for a minute after writing.
How can you write on wood without causing it to bleed?
I recommend drawing the letters on the wood with a pencil first, then filling them in with acrylic paint using a brush or an acrylic paint marker. When you write with a fine liner or an alcohol-based ink, the color will bleed. On the other hand, avoid using alcohol-based ink on your wood.
How do you write on wood permanently?
When it comes to writing and sketching on ceramic products, oil-based paint markers for wood are the ideal alternative because they can be handled, baked, and washed without the color coming off. Water-based paint pens work well for writing on wood. They are also simple to use and maintain.
Is it necessary to dry the wood before you fire it?
The moisture level of firewood should be reduced to less than 20 percent before it is considered “seasoned.” This allows for the most efficient combustion. Firewood with a moisture level that is higher than that may eventually burn, but it is extremely difficult to light and even more difficult to maintain the flame once it has been started.
Before burning wood, do you sand it?
Sand your pieces first to guarantee clear, sharp lines before you begin any wood burning. A smooth surface will produce greater results and be much easier to burn on.
Personalize Your Work
The act of burning your signature into your woodwork products not only enhances their credibility but also improves the value. In my opinion, it also goes a long way in practically immortalizing your professional skills for generations to come. But, the sheer genuine feeling of achievement is what is most clear when learning how to burn a signature into wood products you are making.
Conclusion
So, check out the possible methods available, learn the best way for your scenario, and make that plan to buy. Make sure that whatever your pick, you are good enough also to teach someone else how to burn a signature into wood using your best use-case method.
Thank you for reading how to burn a signature into wood from Woodworkingskills.com. See you at next articles!